
Why has the subject of data security become such a popular thing? This is largely due to technological developments. Ten years ago, a lot of the technologies we use today were just dreams and projects, use of QRcode, biometric identification, fast data exchange in games.
All of this is possible today, technological progress has been a huge leap forward in facilitating our lives. However, this has generated another problem that now takes the spotlight, security within the internet.
With all the data that is generated today in a single application, we see a scenario in which the fragility of the protection of these applications is an act that generates a huge financial and legal problem. With that in mind, new technologies are emerging and bringing tools to deal with the security problem. A much explored example in this blog is the WebAssembly which is specified to run in a secure, sandboxed execution environment. Like other web code, it works by enforcing same-origin policies and browser permissions.
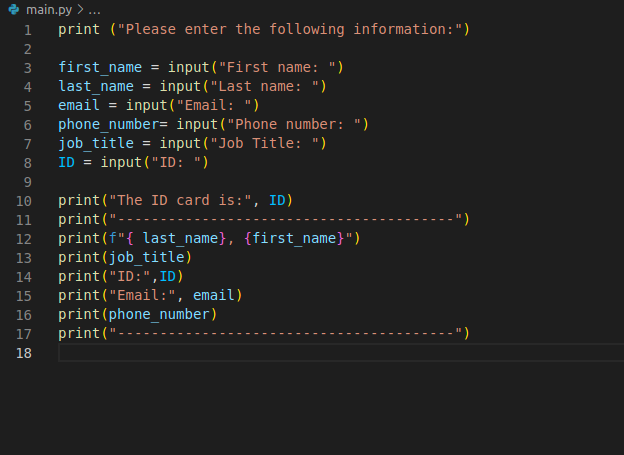
Let's see a small example. In this scenario, we are going to simulate in a simple way the creation of a card linked to the company that an individual works.
First let's start by preparing our programming environment:
First download docker from the link:
https://docs.docker.com/engine/install/
then we have to install:
CPython's WASM build
Steps to build a CPython WebAssembly Build
Clone the repo https://github.com/singlestore-labs/python-wasi/
git clone https://github.com/singlestore-labs/python-wasi/
Change directory to python-wasi using the command: cd python-wasi.
Build the docker image using the command:
docker build -f docker/Dockerfile -t wasi-build:latest docker
Now start the docker container and mount the current directory was working directory inside docker container:
docker run -it --rm -v $(pwd):$(pwd) -w $(pwd) wasi-build:latest bash
To download the CPython source, dependencies and to build the CPython's WASM build, run the command:
./run.sh
The build output is saved at opt/wasi-python/.
Wasmtime
Install wasmtime using the instructions at wasmtime.dev
Let me show the code used to demonstrate:
After making the file and saving it in the bandstand directory, just run the command:
wasmtime run --mapdir=$(pwd)/opt::opt \

             -- opt/wasi-python/bin/python3.wasm -c "$(cat $(pwd)/file.py)"
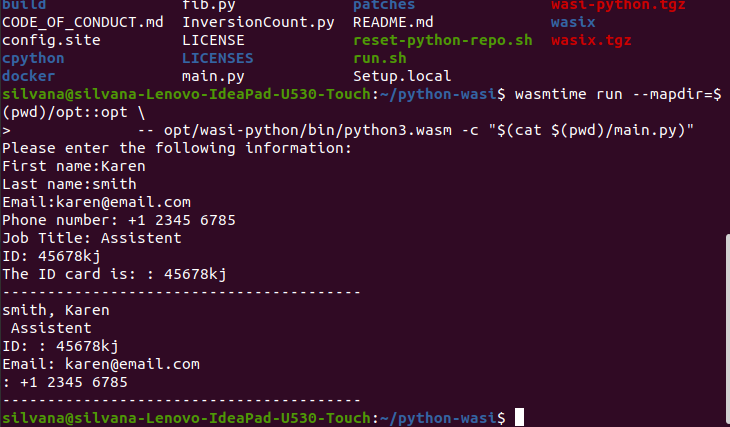
Conclusion: With a small demonstration it is possible to envision the use of such a powerful tool for much more complex projects with important data and information that must be protected.


Top comments (0)